DIY – How to Change the Bongo/Conga Head Skin
Regardless of how gently you treat your ‘babies’, sooner or later every hand-drum player will reach a point where the skin (or head) of his/her instrument needs to be changed or replaced.
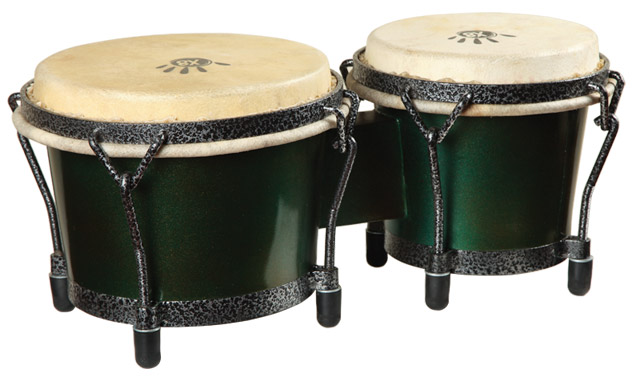
The bongo and conga are no strangers to this rule and will face wear and tear, breakage or other accidents that will demand a new skin or head. Today there is a wide variety available in the market that can be delivered to your doorstep. The aim of this article is to acquaint you the process of replacing/changing the skin of your bongo (or conga).
Tips before you change your Conga/bongo head:
Cowhide is the preferred type for conga heads. It is thick and needs to be soaked in warm water for 3-4 hours to make it flexible enough to work with.
Goat-skin or calf-skin heads suit the bongo. Since they are thinner, they can be soaked in warm water for about 1-2 hours and they will be stretchable enough to use.
Step-by-Step – DIY – How to Change a Conga or Bongo skin:
Items Required –
Step 1: Get rid of the old skin. You can use an Allen wrench/key to loosen the lugs on the bongo/conga. The skin will be between the rim and the skin wire. You can now extract the old skin and dispose of it.
Step 2: Center the new skin on the drum and press the hoop down over it. The rim goes on top. Pick up the edge of the skin and place it between the rim and the hoop and press down. This is called tucking it in and needs to be repeated several times. For example, if your bongos have 6 tuning lugs, you will need to do this 'tucking' six times and you need to ensure that all six of them have the skin in place beneath them. Pull the rest of the skin using the pliers. Get the lugs/brackets and face places aligned so that you can tighten the bolt on it. Don’t tighten it all the way yet, keep the nut loose. Do them in groups of three. After you do the first, do the one that is opposite to it. Then pick another and again do the one on the opposite side and so on.
Step 3: Use your hand to tighten them initially and ratchet the brackets/lugs later. Take the pliers and pull tightly to remove any creases, folds or wrinkles. Ensure that the skin is smooth, even and uniform all around the loop as you proceed.
Step 4: This part can be tricky. You want to ensure that the skin is evenly tightened so keep tightening in a circular motion and don’t be hasty. You can ratchet the brackets/lugs now but check from time to time if you are centering the rim or not because it must be even spaced all around for best results.
Step 5: Once you complete the previous step, take a (X-acto) knife or blade/razor and cut the extra skin. Ensure two things – a) do this slowly or you may end up cutting/nicking the skin which will ruin all the previous steps b) point the blade outwards (away from you) to avoid any injury or mishap.
Step 6: (optional) Moisturize the skin. We recommend shea butter over lotion because using organic material on the organic skins is better. If you put fragranced lotion on the skin it could cause problems. Also, by playing the drum the natural oils from our skin do the best job of maintaining the moisture level. If shea butter is used it should be a very minimal amount, barely noticeable.
Step 7: Enjoy your newly fitted skin and jam your heart out!
Recent Posts
-

Win Free Drum Shop Credit
Weekly X8 Drums Giveaway Win Free Drum Shop Credit Join the X8 Drums email list for drumming tip …4th Jul 2026 -

What's Your Zodiac Drum? The Perfect Percussion Instrument for Every Sign
Every drum has a personality. Some instruments lead the circle with a bold voice, some hold the gro …22nd Jun 2026 -

How to Choose Your First Djembe: A Beginner's Guide to Size, Sound & Materials
The djembe is one of the most powerful, expressive, and approachable hand drums in the world. It ca …5th Jun 2026